Welcome!
Have questions about Tricolops' products or services? Browse this forum for answers. Have a question? Register and post them here, our support and engineering staff actively monitor this forum and will answer within 1 business day.
Tricolops Dimensioner Software Setup Guide
This document help you setup Tricolops Dimensioning Application for the first time.
-
Save Tricolops Dimensioning Application installer to local hard drive.
Download from https://tricolopstechnology.ca/r/tda-download
-
Install the downloaded application.
To ensure the application and device drivers is installed successfully:
- temporarily disable / close anti-virus software
- install using a user account with administrator permissions. -
After install finishes, double click the Tricolops application icon on the Desktop.
-
Follow the Setup Wizard to setup the Tricolop application:
-
Connect to Scale
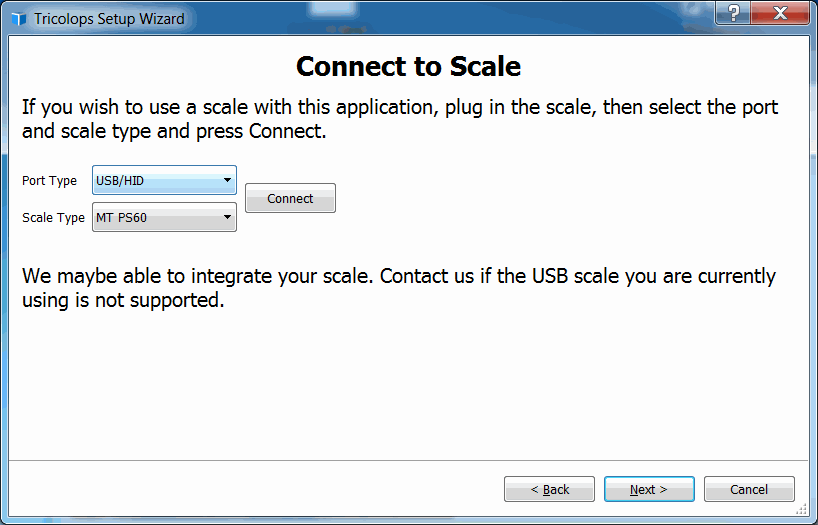
Connect a supported USB scale to the computer. Check here for the list of supported USB scales.
Select the supported scale from drop down and press Connect. Press Next when connection is successful.
Alternatively, a scale can be connected by going to Advanced → Scales.
-
Change Unit of Measurement
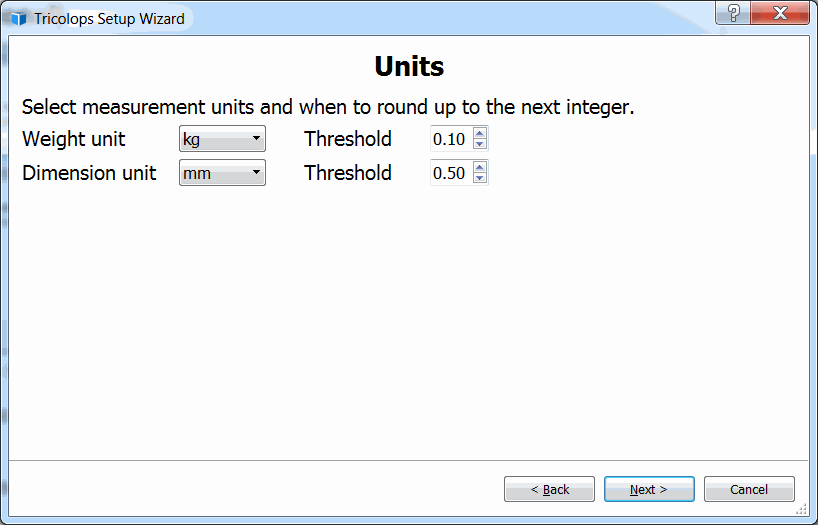
Select the appropriate units for use. Threshold specifies when to round up to the next integer. For example, if the threshold is set to 0.1, 3.05 would be rounded down to 3, while 3.15 would be rounded up to 4.
Alternatively, measurement units can be changed by going to Options → Dimension Unit and Options → Weight Unit. Rounding threshold can be changed by going to Advanced → Options → Integration, and adjusting dimension and weight rounding threshold.
-
Hotkey Integration
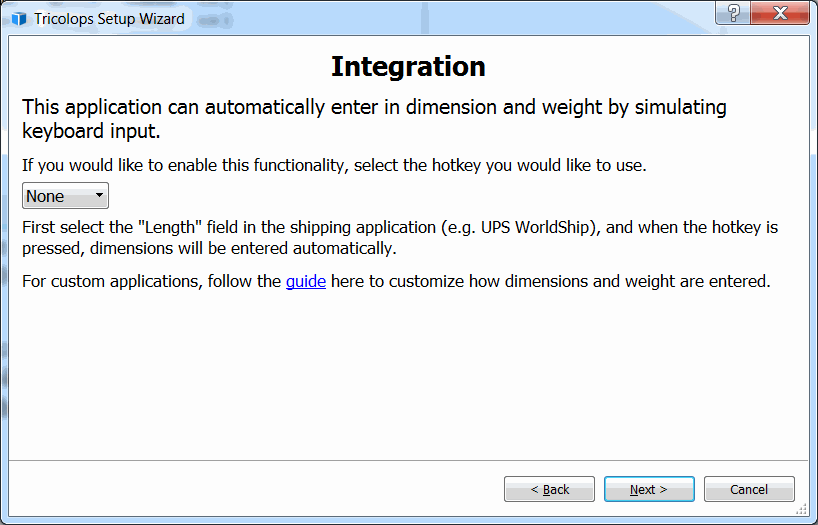
Tricolops Dimensioning Application can automatically enter dimensions into any Windows or web application. Click on the “Length” field in the shipping application, and press the specified hotkey.
Alternatively, the hotkey can be changed by going to Advanced → Options → Integration.
Contact support@tricolopstechnology.ca if you are entering both the dimensions and weight using the Tricolops Dimensioning Application.
-
Dimension Area Setup
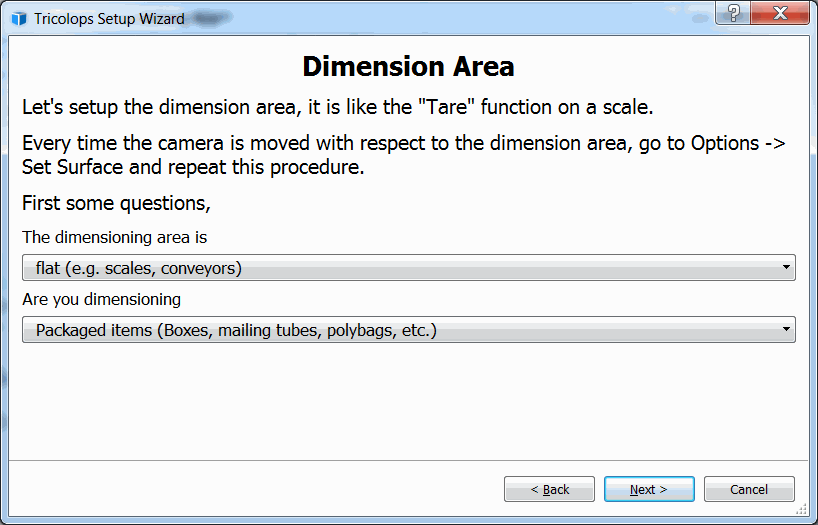
It is recommended to use the default setting unless:
-
The surface of the scale / conveyor is not even, then change the first drop down to “uneven”
-
There is trouble calibrating the trigger area in the next step, then press Back to this step and change the first drop down to “uneven”
-
There is trouble dimensioning unpackaged items, then change second drop down to “unpackaged items”
-
-
Trigger Area Setup
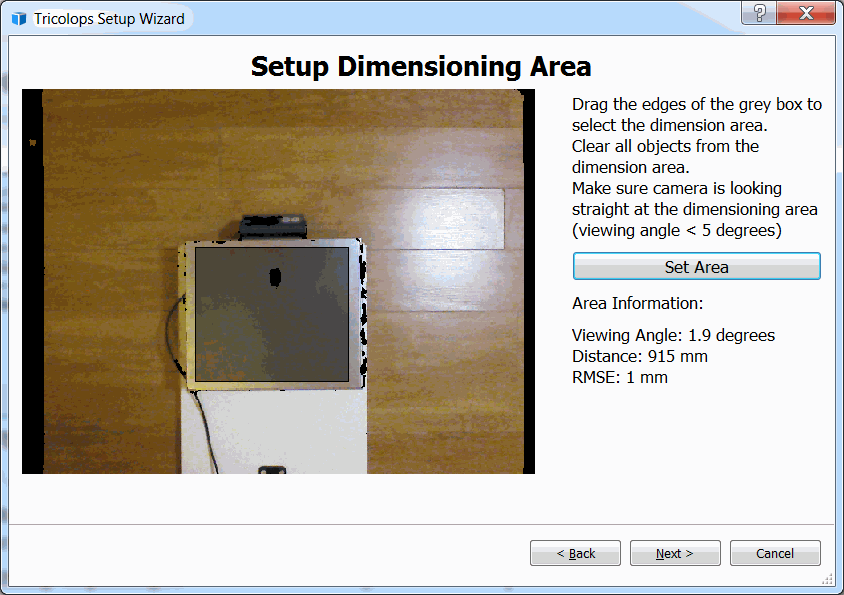
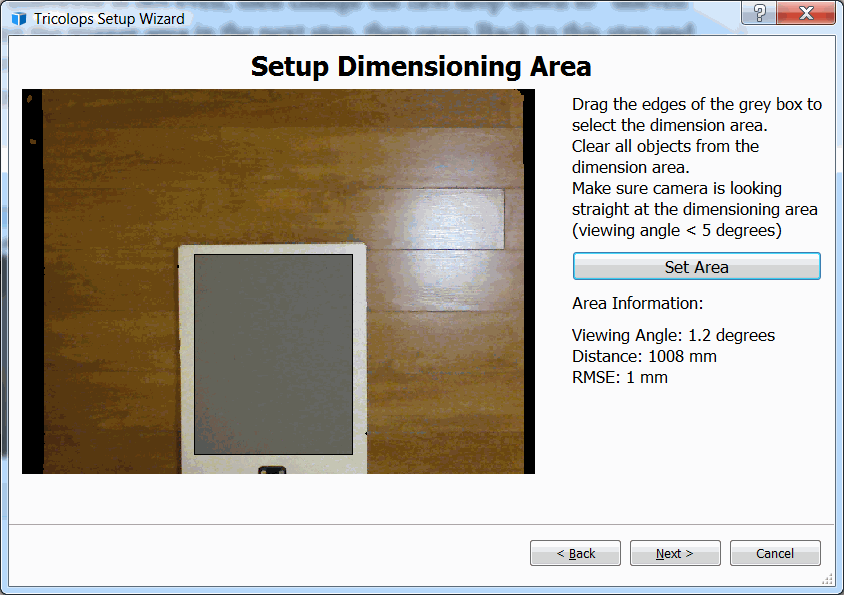
Specify the trigger area by dragging the edges of the black square. The trigger area must a flat surface.
With a scale: set the trigger area to be slightly inside the top surface of the scale (top image). Without a scale: set the trigger area to be slightly inside the white baseboard (bottom image).
Alternatively, the trigger area can be changed by going to Options → Set Trigger Area.
-
-
Test Setup
Test setup is successful by placing an object within the trigger area.
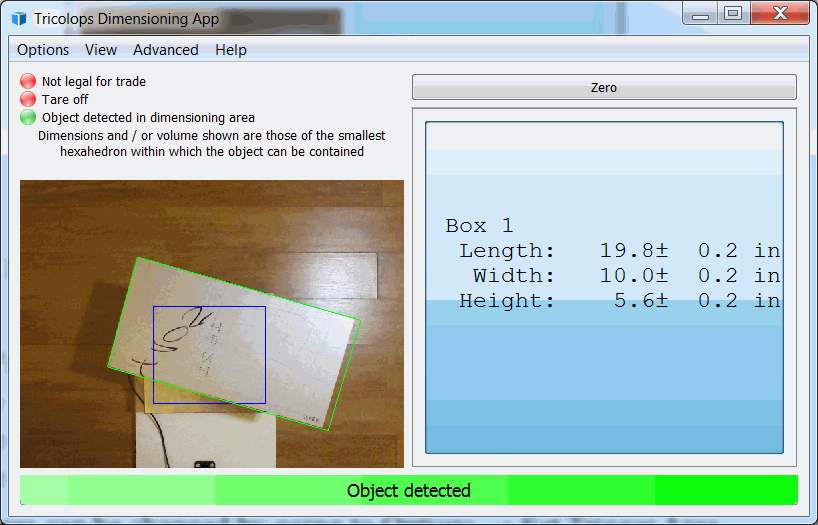
To dimension an object:
-
Align the center of the scale to the center of the camera
-
Place object on the scale / baseboard in any orientation / position
-
The object must be completely within the camera's field of view
-
The object must be partially or completely within the trigger area
-
Add a Comment
Keep Informed
About This Community
This forum is actively monitored by our support and engineering staff. Read Guidelines
Question tools
Stats
| Asked: 11/26/18, 10:33 AM |
| Seen: 6784 times |
| Last updated: 11/26/18, 10:57 AM |